Looking for more house tips? Search through Houseblogs.net!

Showing posts with label construction. Show all posts

Tuesday, October 20, 2009

yet another picture of don swinging a hammer

Over the weekend we got the last few bits of preparation out of the way for the incoming flurry of contractors. We worked on cleaning up and condensing our stuff, since it's going to get moved around a lot. We took five huge bags of clothing and some other stuff to Goodwill, and cleaned out everything we could from the basement. We condensed my craft and business supplies down to two tables instead of three, and cleaned off our desks. All very exciting.

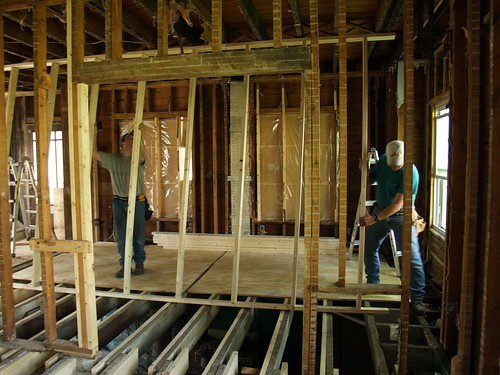
We also added two inches to the header in between the dining room and the living room:


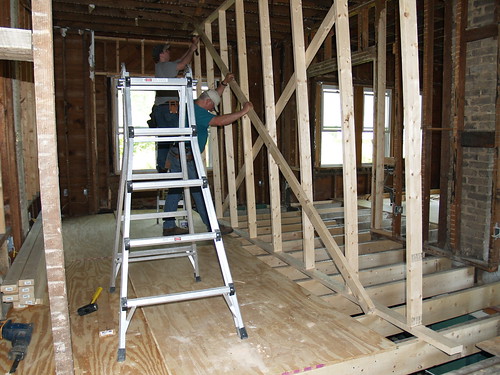
Don wanted the header to be exactly the same size as the one separating the dining room from the kitchen, so he hopped up on the scaffolding and added a 2x4 to the bottom of it, which did the job. He also built a small wall in the guest bathroom, something we decided to to in the hopes of making the room feel a little less slanted - it cuts off the very back of the room, where the eave slants down almost to the floor, and makes the room feel bigger.

The electricians are here today, making lots of noise and getting lots done. The plumber is coming by a week from today to do the final rough-ins in the master bathroom. I'm trying to get in touch with the drywall guy - once the electricians and plumber are done, believe it or not he's the next step! Hard to believe we might have actual walls soon. I'm waiting for something to go wrong.

Monday, October 05, 2009

pocket doors

Pocket doors. They're awesome. Most of you have seen them, somewhere, sometime; they're doors that slide into the wall rather than swinging out into the room. They save a lot of space. What you may not have seen is the framing that's involved in installing a pocket door. When we first decided to put them in, we knew nothing about how to install them or frame for them. After a great deal of research, we discovered that they are SO EASY. All you have to do is leave a blank hole in your wall that's double (or so) the width of your doorway. Then you buy a kit -- we bought ours from the best in the business, Johnson Hardware. In fact, we bought five of them. The kit comes in a giant long box, and contains a header, studs, and all of the hardware to install them, plus of course the track for the door itself. You provide the door.

So. You've got your gap in the framed wall. You hammer in a nail at each end, at a prescribed height. Then you just hook the header onto the nails, rotate it into place, make sure it's level, and bang the nails the rest of the way in, adding a few more for good measure. Bang, header in place. The studs are, essentially, half-studs; they're metal-clad 1x3s. They slip into a metal bracket, which spaces them the right width apart on the floor. You attach the tops of the studs to the header, nail the bracket into your floor, and bam. You've got a pocket door frame.

Once the kit's installed, it's best if you can put in a little bit of framing above the header, just for the sake of structural stability. It's not too hard to bang in a few header studs. Overall, installing pocket doors is crazy easy. We've put them at the entrances to the master bathroom, master closet, and guest bathroom upstairs. We also decided to put in a double set of pocket doors downstairs, between the dining room and the office/library, where we had originally planned on leaving a large opening instead. We like the idea of being able to close off the office a bit - and the deciding factor was when we realized that we could use the antique doors we found in the attic as the double sliding doors. They're solid wood, with dozens of squares of antique beveled glass set in them. I'm looking forward to refinishing them and hanging them; they're the perfect entrance to a library.

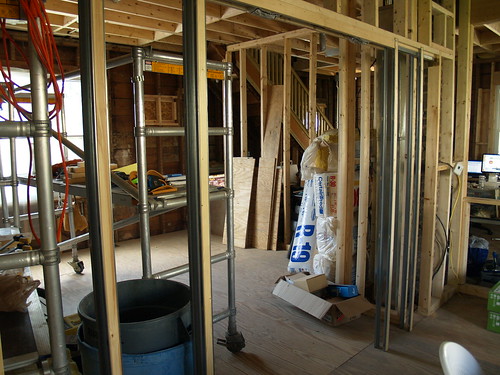
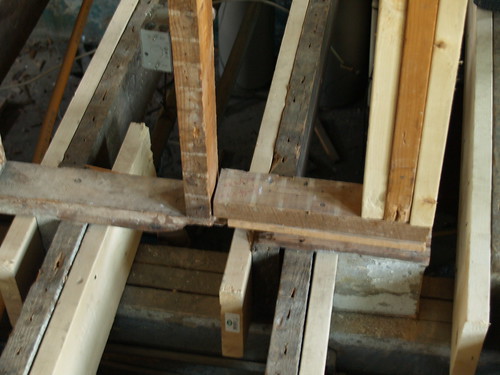
In the picture below, you can see the double pocket doorframe we installed downstairs. It's not much more complicated than installing a single frame -- all you have to do is slice off a bit of one of the headers and hook it into the other one with a special bracket, sold separately. Then it's the same procedure.


It may be a little hard to distinguish everything, what with the giant construction mess and scaffolding behind the doorframe. Sorry, not much I can do about it. I'm looking forward to getting rid of it as much as you are!

The drywallers will cover up the studs, of course, and leave the wide doorway open. When it warms up a little, I'll strip the doors and refinish them, and we'll hang them up and be done. The upstairs doorways, incidentally, are also getting antique doors -- we saved all of the original doors from the house and will be stripping, refinishing, and re-hanging them. The master bathroom and master closet may get replicas instead of the originals (or maybe we'll be able to find something at an architectural salvage shop), as they are new openings that weren't in the original house. For the time being, though, we're just going to be living without doors. Not a huge hardship, given what we've lived without so far!

Got any questions about installing pocket doors? Leave them in the comments, we'll try to answer! With the obligatory disclaimer, of course, that we're not experts and you probably shouldn't really take our advice on anything, but whatever.

Tuesday, January 20, 2009

brave new floor

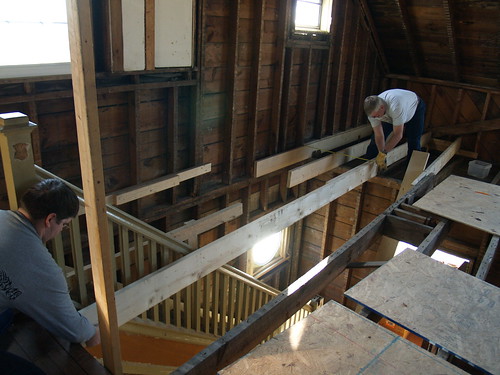
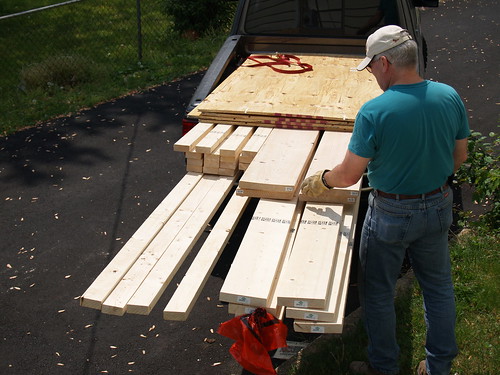
Remember this? What a difference a few weekends can make! Don and his dad spent this Saturday working on the upstairs floor, and they got a truly tremendous amount of work done. Our friends at the Lansdowne Home Depot delivered a big pallet of lumber on Friday (with a truly excellent forklifting performance by one Randy, witnessed by yours truly) and at precisely 8 AM on Saturday the work began.

I don't know how many of you remember when we did this downstairs (what would we do without the Internet to help us remember?), but we are doing things a little differently upstairs. Rather than keeping the old joists in and sistering new ones to them to make the attached subfloor level, we elected to rip out the old joists and put new ones in. The reasons for this were many, but the important ones were that the old joists were in incredibly bad shape -- worse than the ones downstairs -- with cracking, rotting, and sometimes just plain bad installation. Additionally, there was the issue of the random change in the joists' direction in the middle of the house. So, all in all, it was deemed more sensible to just replace the joists upstairs.

The first few joists around the staircase and in the future master bathroom were ripped out ASAP, and the first piece of wood went up against the exterior wall of the house.


Here's where the clever part came in. Using that first joist as their baseline, they were then able to install a sill on the front wall of the house, creating a level base to nail all the joists into. The edge of the porch ceiling provided another level base, to end the first joists (front of house to mid-master bedroom) and start the second (mid-master bedroom back to center of house). In the picture below, they're setting the first of the mid-house joists. There's a lot of measuring involved. The end of the joist is resting on the wall that divides the center of the house downstairs, between the living room and everything else. When they do the back half of the floor upstairs, they'll install an end cap against that layer of joists for some extra stability.


I had honestly expected them to just get the wall cut down, move the lumber inside (Home Depot will only deliver to your driveway), and get the first few joists laid, mostly in the front section. But you can see what they accomplished by the end of the day on Saturday below -- Don was installing the last few pieces of cross-blocking when I took the last pictures of the day. Check out the difference between the picture below and the image from the 'vast wasteland' post linked at the top of this post! They're taken from the same place (squeezed into the tool closet which will someday be the guest bathroom) and the changes are awesome.


As a final note, I'd like to point out that anybody who follows me on Twitter, particularly on Saturdays, will generally get the play-by-play commentary of all of this stuff going on as it happens. It's a fun time.

Sunday, January 18, 2009

a strange shot


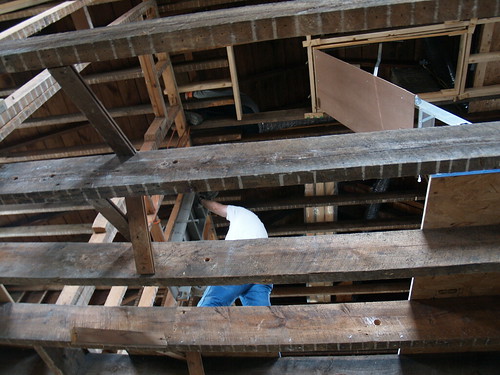
This picture came out so interestingly that I had to post it. I was standing on the first floor, in the living room, shooting almost straight up. Don's dad was in the second bedroom upstairs, handing something up to Don, who was perched in the attic. Really drives home the fact that the house is really, truly completely gutted!

Friday, August 01, 2008

a ladder for the ages

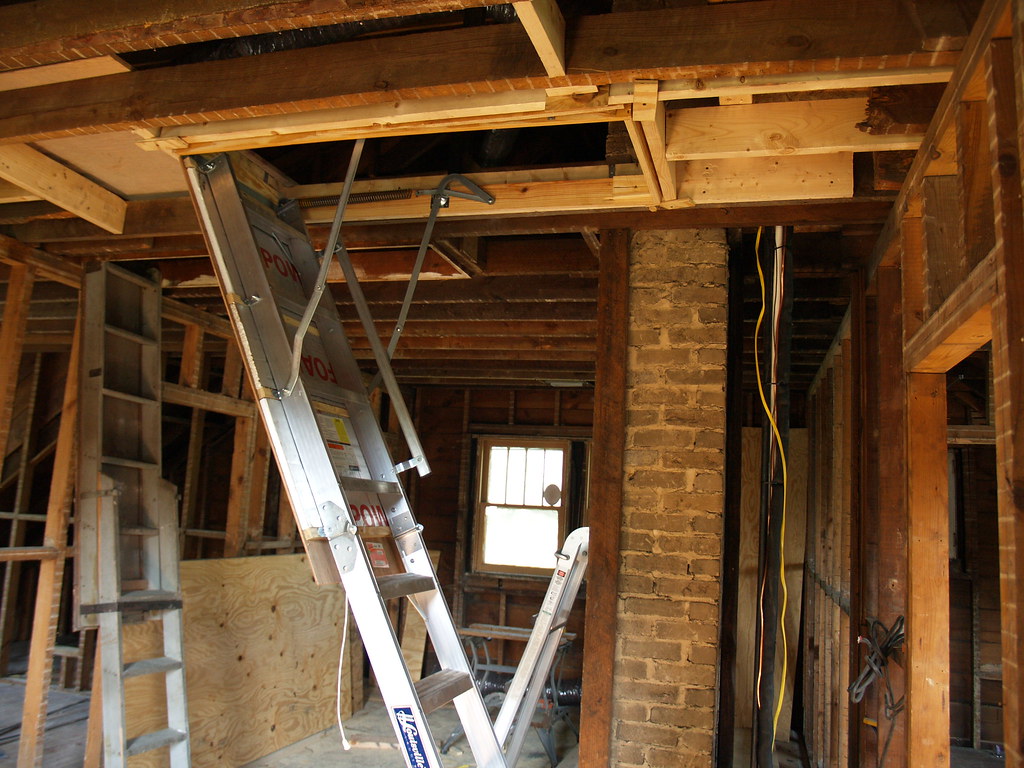
This house, like many older homes (and, for all I know, lots of newer homes) has a big huge attic, accessible by one of those trapdoor ladder things. The original ladder was installed by Don's grandfather, and, like many of the things in this house, was both very clever and very frightening. It was held up by a terrifyingly visible pulley that involved steel cable and a screw eye sunk into the guest room floor. Folding the trapdoor back up into the ceiling was a two-person job; one person had to stand on their tiptoes and push the unit up into the ceiling and hold it there while the other one pulled with all their weight on the pulley cable to get the hook to slip over the edge of the screw eye.

In addition to all that, the ladder itself was... shall we say... nonstandard. It was approximately one foot wide, ensuring that nobody with hips could get up into the attic; it was constructed -- possibly by hand -- entirely out of wood; and, mysteriously, it was blue.

Our HVAC contractor, on his very first trip out here (something like TWO YEARS AGO ARGH), told us flat out that there was no way he could install our upstairs HVAC unit without a new ladder. Aside from the safety issues, which didn't concern him overly much although they terrified me (did I mention that there was a LIVE WIRE crossing the opening, for no good reason?), the hole in the ceiling was simply too small to fit the unit through. So one of the things that had to be accomplished before we could have the last of the HVAC installed was to replace the ladder.

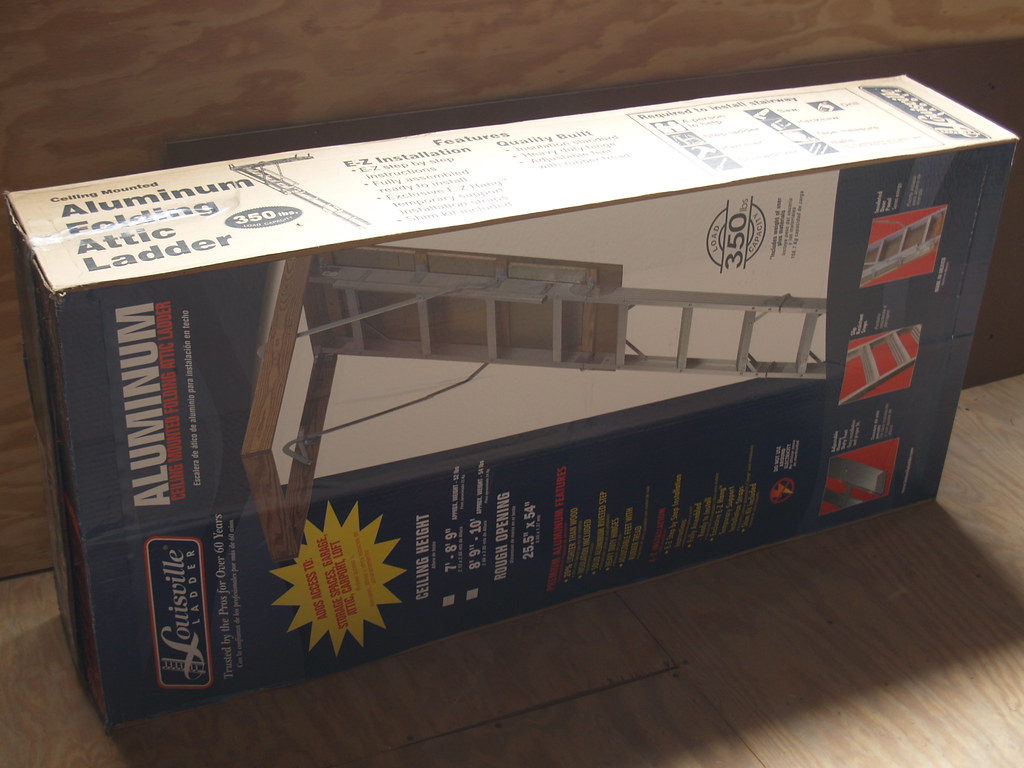
Fortunately, it turns out that you can just run over to your local home improvement superstore and buy attic trapdoor ladders. In boxes!


The original ladder was in the middle of the three upstairs bedrooms. We decided that if we were going to replace the darn thing anyway, we might as well put it in a much more convenient location so that our use of that room would be unfettered. The upstairs landing, as most of you know, is absolutely gigantic, so we decided that the landing was the place for the new ladder.

So Don and his dad framed in an appropriately sized hole, and installed the new ladder over a weekend in April, with much swearing. Like everything around here, it took longer than they expected and involved a lot of shimming. But it's in, and it works, as you can see.


We haven't taken down the old blue ladder yet -- it's bolted into the joists, and we just haven't gotten around to dealing with that. Just ignore it and admire the shininess of the new one.

Friday, May 18, 2007

a typical supply run


We give Home Depot a lot of money every week. Especially since the cost of plywood has gone up by two dollars a week for the last three weeks! Argh!

Thursday, May 17, 2007

current house status

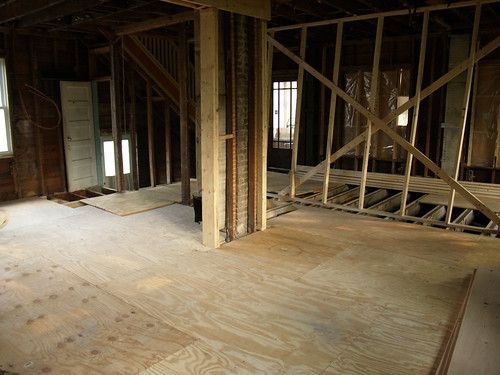
Here's what the first floor looks like right now. As you can see, the house is still being held up by the temporary wall -- Don and his dad were pretty much dead on their feet by 6 PM Saturday (they'd been working since 7 AM) so even though they had a couple of hours of daylight left they decided to go ahead and leave it at this stopping point. If you're wondering about layout, incidentally, this is the view from the kitchen (or will be, once we knock down the wall I was leaning against). The kitchen is at the back of the house. The room to the left will be the family room, the room we are in is the dining room, and the room the temporary wall is in is the living room. You can see the front door all the way in the background, and the open door on the far left leads down to the basement.


Don said this morning when I was leaving for work that he thinks they'll finish up on Saturday when they work again; as you can see, what's left to do is to build and install the new wall (a little more complicated than it might be, since we're doing the columns and built-ins), install three or four more joists (in the front hallway), and finish out the subfloor. I don't know if he's right in his assumption, but it would be awfully nice to get this over with. After this construction work is done, they need to wire a few outlets in the living room and then we're going to move all of our stuff either downstairs (the necessary stuff like bed, clothes, and computers) or out to the garage (the remainder of the boxes of stuff that are currently taking up space in the upstairs office). Then we finally get to call the HVAC guy.

PS - Local folks, don't forget about the Baltimore Blogger Happy Hour tonight! I'll be there.

Wednesday, May 16, 2007

how to remove, replace, or rebuild a bearing wall

The first thing, of course, is to determine whether or not your wall is a bearing wall. Helpful tip: if you can't figure it out, don't start your work until you call somebody who can (your father-in-law is often a good bet, as are any architects or general contractors you might be hiding in your closets).

The basic premise of this whole process is that you've got to hold up your damn house. It's a pretty simple concept. So, if you're going to be taking out the wall that's
currently holding it up, you'd better have something else in place before that support goes away. So, you build a temporary wall.


Don and his dad put the studs on their temporary wall 24 inches apart rather than the standard 12 inches apart because a) it's temporary and b) we all have big butts. Once it was built, we had an old-fashioned barnraising!


You'll notice that they installed the temporary wall about five feet away from the wall slated for removal, to give themselves space to work but also make sure that the weight of the house is still being distributed fairly evenly.

Once they had banged the temporary wall into place, making sure that it was square, they dropped a few duplex nails into it for security's sake (believe me, that thing is wedged in so tightly that it's not going anywhere). Finally, they installed diagonal crossbars for added support.


And at last, it was time for demolition of the old wall. As you can see, Don was quite pleased.

Tuesday, May 15, 2007

not so structurally sound

This is what used to be holding up my house.


Yes, it is a small square of wood. The middle wall of the house was apparently held up solely by that piece of wood and this almost-completely-gone sill plate:


Fantastic!

As you might guess, the big project right now is rebuilding that wall. On the plus side, since we have to rebuild it anyway, Don has agreed to my Craftsman-style redesign, which will create a little more open space.

More on the process tomorrow. With action shots!

Friday, May 11, 2007

a very uncomfortable place


And not the back of a Volkswagon, either.

Monday, April 30, 2007

ten points if you can figure out what's going on

MATERIAL SAFETY DATA SHEET

SECTION 1 CHEMICAL PRODUCT IDENTIFICATION

SUBSTANCE: PLYWOOD

PRODUCT USE: Building/construction product

-=-=-=-

SECTION 3 HAZARDS IDENTIFICATION

COLOR: natural wood

PHYSICAL FORM: solid wood board

ODOR: faint pine or no odor

POTENTIAL HEALTH EFFECTS

SKIN CONTACT

SHORT TERM EXPOSURE: Wood dust may cause: irritation, allergic reactions,

rash

Tuesday, April 24, 2007

those clever nailmakers

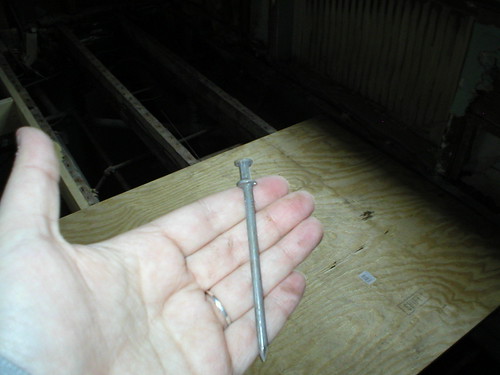
This is a duplex nail.


It's called that because it has that little mutated head on top of it, so that it has double heads. Kind of freaky. Duplex nails are great for when you need to do something temporary, because you just nail it in up to the first head and can use the second head to pull it out later. Like, for instance, if you're cutting a board that is as long as your room and have to stick it through the wall for balance!


You just nail a piece of scrap wood to the studs with duplex nails at the appropriate level, and boom! Instant -- and temporary! -- sawhorse. Fantastico.

Monday, April 23, 2007

how to add cross bracing to your floors

There's no special secret to cross bracing. No special material, no special technique. You may remember the old cross bracing between our joists -- it was made of spare pieces of hardwood flooring. For the new cross bracing, Don and his dad just used spare pieces of joist beams, since they had it around from putting in new joists (this technically makes it "solid blocking", since it's just one piece of wood). They measured carefully and cut a piece of the board exactly to fit in between each joist (yes, you have to measure each space, since they are all going to be a little different) and then just nailed it into place.


The one thing they did differently than the old system was to actually add more cross bracing. Originally, the bracing just went in a straight line across the middle of the room. What we did instead was to install cross bracing at every seam in the subfloor. Every place where one sheet of plywood ends and another starts is reinforced with cross bracing all the way across. Basically, this winds up meaning that there's a row of cross bracing going across the entire space every four feet (since plywood comes in four-foot-wide sheets!). It makes the floor a lot more sturdy.

Good construction starts where you'll never even see it. Doing it right the first time means we won't have to go back in and do it again, and what we're building will last a long, long time. Adding the cross bracing every four feet certainly adds some time to the process, but it also creates a really strong foundation for everything we're going to build on top of that subfloor.

And heaven knows we don't want
our grandchildren going in and renovating this house many years from now and complaining about us like we complain about this stuff!

Tuesday, April 17, 2007

we're the turtle, not the hare

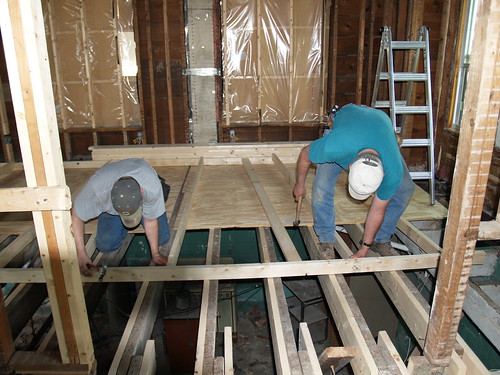
Slow and steady wins the race! The first few pieces of subflooring are in. There are three or four more joists to put in in the dining room and family room, and then the living room and foyer need to be done, but right now, when you step from the kitchen into the family room, you step on solid floor. It's so exciting!


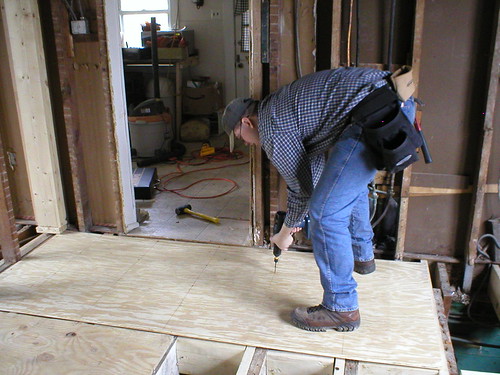
That's Don screwing in the first piece of subfloor (and making fun of me for asking him to face the camera a little more while he was doing it).

I'll post something a little more detailed about the process later this week; my workload has abruptly picked up so I'm busy trying to cross things off of my to-do list. But I took LOTS of pictures this weekend while the menfolk were working (they kept yelling for me to come downstairs with the camera because they were doing "something interesting" -- once it was snapping a chalk line, good lord). So don't worry, more is forthcoming.