
So. You've got your gap in the framed wall. You hammer in a nail at each end, at a prescribed height. Then you just hook the header onto the nails, rotate it into place, make sure it's level, and bang the nails the rest of the way in, adding a few more for good measure. Bang, header in place. The studs are, essentially, half-studs; they're metal-clad 1x3s. They slip into a metal bracket, which spaces them the right width apart on the floor. You attach the tops of the studs to the header, nail the bracket into your floor, and bam. You've got a pocket door frame.
Once the kit's installed, it's best if you can put in a little bit of framing above the header, just for the sake of structural stability. It's not too hard to bang in a few header studs. Overall, installing pocket doors is crazy easy. We've put them at the entrances to the master bathroom, master closet, and guest bathroom upstairs. We also decided to put in a double set of pocket doors downstairs, between the dining room and the office/library, where we had originally planned on leaving a large opening instead. We like the idea of being able to close off the office a bit - and the deciding factor was when we realized that we could use the antique doors we found in the attic as the double sliding doors. They're solid wood, with dozens of squares of antique beveled glass set in them. I'm looking forward to refinishing them and hanging them; they're the perfect entrance to a library.
In the picture below, you can see the double pocket doorframe we installed downstairs. It's not much more complicated than installing a single frame -- all you have to do is slice off a bit of one of the headers and hook it into the other one with a special bracket, sold separately. Then it's the same procedure.
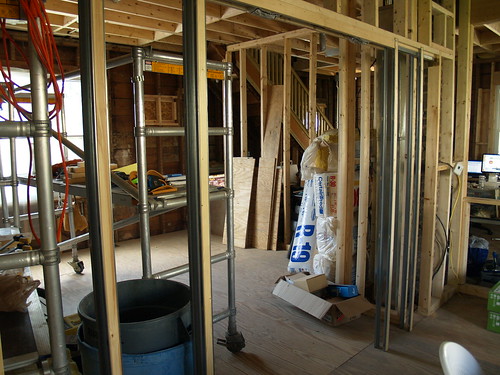
It may be a little hard to distinguish everything, what with the giant construction mess and scaffolding behind the doorframe. Sorry, not much I can do about it. I'm looking forward to getting rid of it as much as you are!
The drywallers will cover up the studs, of course, and leave the wide doorway open. When it warms up a little, I'll strip the doors and refinish them, and we'll hang them up and be done. The upstairs doorways, incidentally, are also getting antique doors -- we saved all of the original doors from the house and will be stripping, refinishing, and re-hanging them. The master bathroom and master closet may get replicas instead of the originals (or maybe we'll be able to find something at an architectural salvage shop), as they are new openings that weren't in the original house. For the time being, though, we're just going to be living without doors. Not a huge hardship, given what we've lived without so far!
Got any questions about installing pocket doors? Leave them in the comments, we'll try to answer! With the obligatory disclaimer, of course, that we're not experts and you probably shouldn't really take our advice on anything, but whatever.
2 comments:
After reading about your pocket doors project, I think it would make a great contest entry in our “Share Your Project” home renovation contest. You can win up to $2,700 by uploading your project description and the before and after photos you’ve already taken. I hope you’ll consider submitting your project.
Thank you for the invitation! If the contest is still running by the time the work is done and we have any 'after' photos, I'll certainly enter it -- right now we're still very much in 'before'!
Post a Comment